Add a Customer Column to a Space
min read - Updated on Oct 28, 2026You can add a Customer Column to a Space so that every piece of feedback in it is tied to the customer who wrote it. The Customer Column is the column of your files telling whose feedback a record is: a customer code, an ID, a number or an email. Once a Space has one, Kimola recognizes the same Customer in every Space that uses the same key and gathers all of their feedback on one page under CUSTOMERS.
You choose the Customer Column in the Schema step when you upload the first file of a Space, or later, on the Space's Files page, for a Space that already has files. The records already in the Space get their customers from the values they kept in that column, without being classified again.
Customers are available in the Enterprise package. They are also available in Kimola On-Premises.
Your files need a column with a key your organization already uses for its customers, such as a customer number in a call center export, an account number in a CRM export or the email of a survey respondent. Kimola needs no names and no profiles. A Space can have only one Customer Column, and it stays for every file after it. Kimola matches customers across Spaces by the key alone, so use the same key as your other Spaces: a customer known by their email in one Space and by a customer number in another appears as two customers.
With the First File
The simplest way is to choose the Customer Column with the first file of a Space, because then every record of the Space has its customer from the start. The first file sets the Space's schema, and the Customer Column is part of it. See Add Files to a Space for the whole upload.
Step 1: Upload the First File
Open the Space, go to Files and click Add data, or Upload the first file for an empty Space. Choose your .xls, .xlsx, .csv or .tsv file in the Dataset step and click Continue. The Schema step opens.
Step 2: Choose the Customer Column
Under the Date Column is the Customer Column, marked optional: "The column telling whose feedback a row is: a customer code, an ID, a number or an email. Every customer gets a page with all of their feedback, across your spaces."
Open the list, which starts at No customer column, and pick the column that holds your customer key. It can't be the date column or a column of a text field.
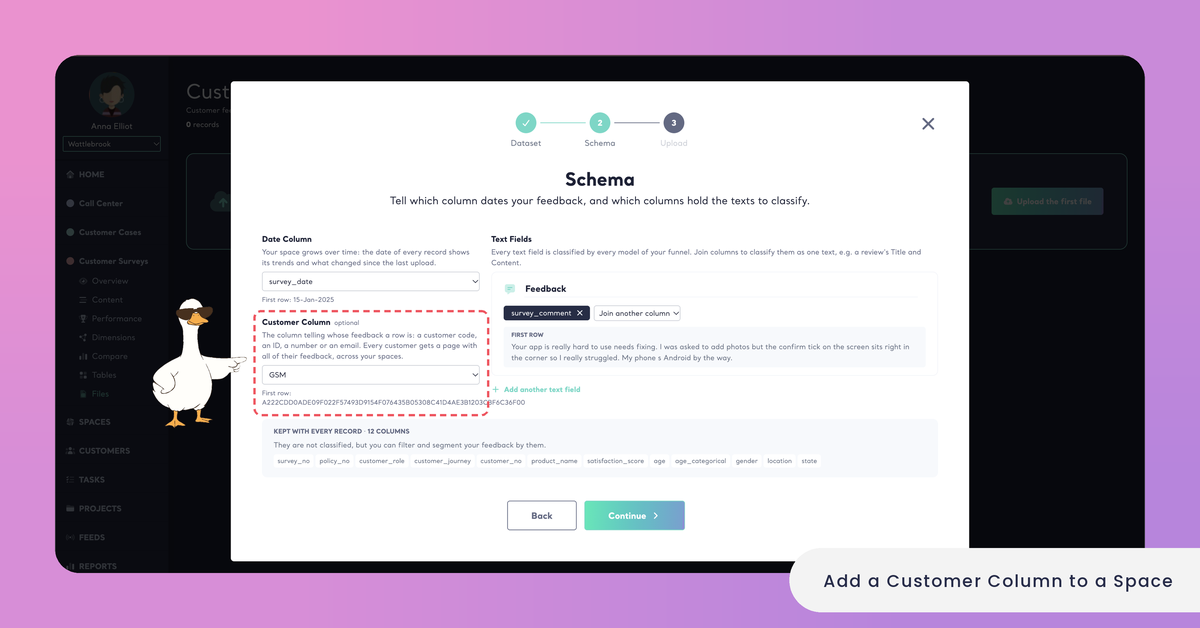
Step 3: Finish the Upload
Choose the date column and the text fields as usual and click Continue. The SUMMARY of the Upload step shows the Customer Column with the file, so you can check it before anything is classified. Click Upload. As soon as the file is classified, its customers appear under CUSTOMERS.
For a Space That Already Has Files
A Space whose files came before its Customer Column can get one at any time. This is the case when you started a Space without customer keys, or when your exports only later began to carry a customer number. You set it on the Space's Files page, and the records already in the Space get their customers at once.
Step 1: Open the Space's Files Page
Open the Space and go to Files. The SCHEMA card at the top shows the column the Space is dated by, its text fields and the number of columns it keeps. A Space without a Customer Column shows Choose a customer column in this card.
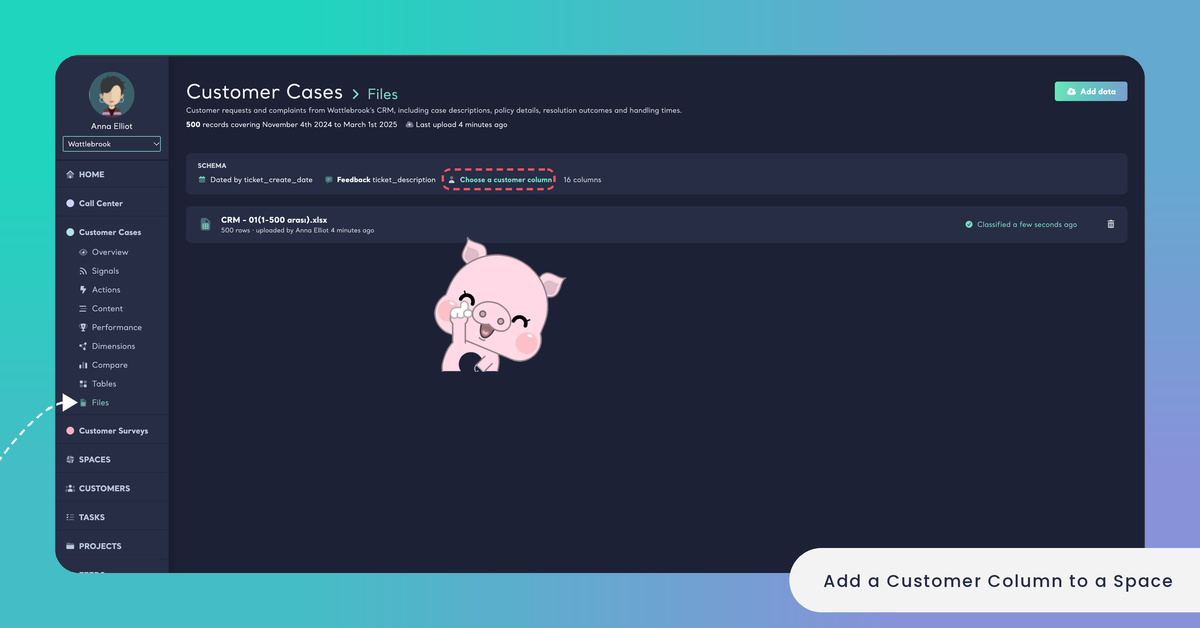
Step 2: Choose a Customer Column
Click Choose a customer column. The Customer Column panel opens: "Choose the column telling whose feedback a record is (a customer code, an ID, a number or an email). The records already in the space are given their customers by the values they kept in it, without being classified again."
Open Choose a column. The list offers the columns the Space keeps with every record, each with its number of values, for example "Customer No · 2,110 values".
The number of values helps you find the key. A customer key has about as many different values as you have customers; a column with a few dozen values, such as a region or a problem type, describes a segment, not a customer.
Only the columns the Space kept from its files are offered. If the key you need is not in the list, it was not part of the Space's schema, and the records already in the Space don't have it.
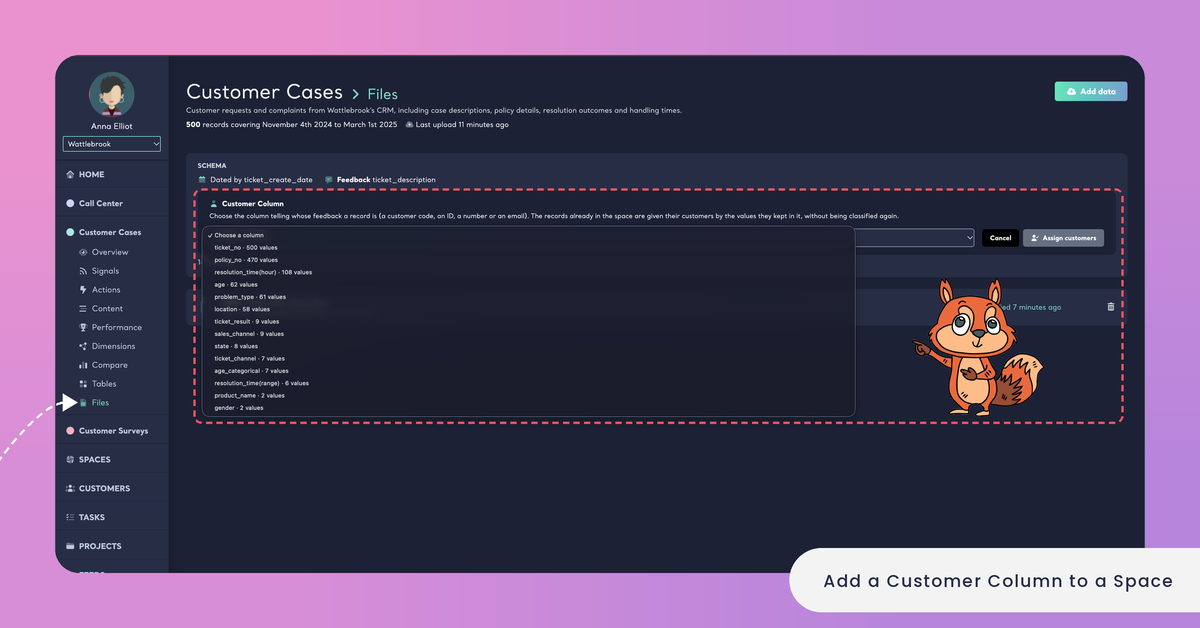
Step 3: Assign the Customers
Click Assign customers. The button becomes available once a column is chosen. To close the panel without changing anything, click Cancel.
When the customers are assigned, the SCHEMA card shows Customers with the column the Space reads them by, and a link to the Customers list.
You can't set a Customer Column while a file of the Space is being classified. Wait until every file on the Files page shows Classified, then choose the column.
With a Later File
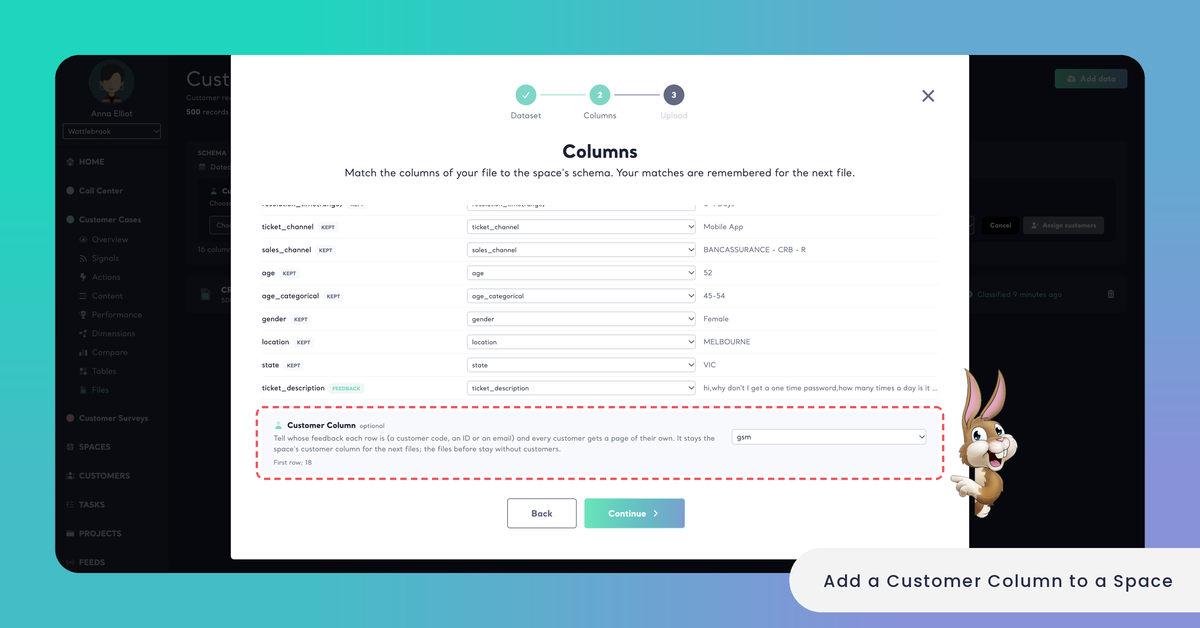
A later file can also bring the Customer Column, when the Space has none yet. In the Columns step of the upload, the Space's schema offers a Customer Column, marked optional: "Tell whose feedback each row is (a customer code, an ID or an email) and every customer gets a page of their own. It stays the space's customer column for the next files; the files before stay without customers."
This way, only the new file and the files after it have customers. The records of the earlier files stay without customers.
To give every record of the Space its customer, set the Customer Column on the Files page instead, before you upload the new file. See Add Files to a Space.
What Happens to Existing Records
When you set the Customer Column on the Files page, every record of the Space's classified files gets its customer from the value it kept in that column. Nothing is classified again: the records keep their themes, sentiment and Dimension answers, and assigning customers uses no queries. Records whose value is empty, or longer than 250 characters, stay without a customer.
Kimola then counts every customer again: their records, the Spaces their feedback comes from, the dates of their first and latest feedback, and their NPS. A customer who already had feedback in another Space with the same key now has this Space's feedback on their page too. New customers appear in the Customers list. See Find a Customer and Overview in Customers.
Keys are matched ignoring upper and lower case and the spaces around them, so "C-1042", "c-1042" and " C-1042 " are the same customer.
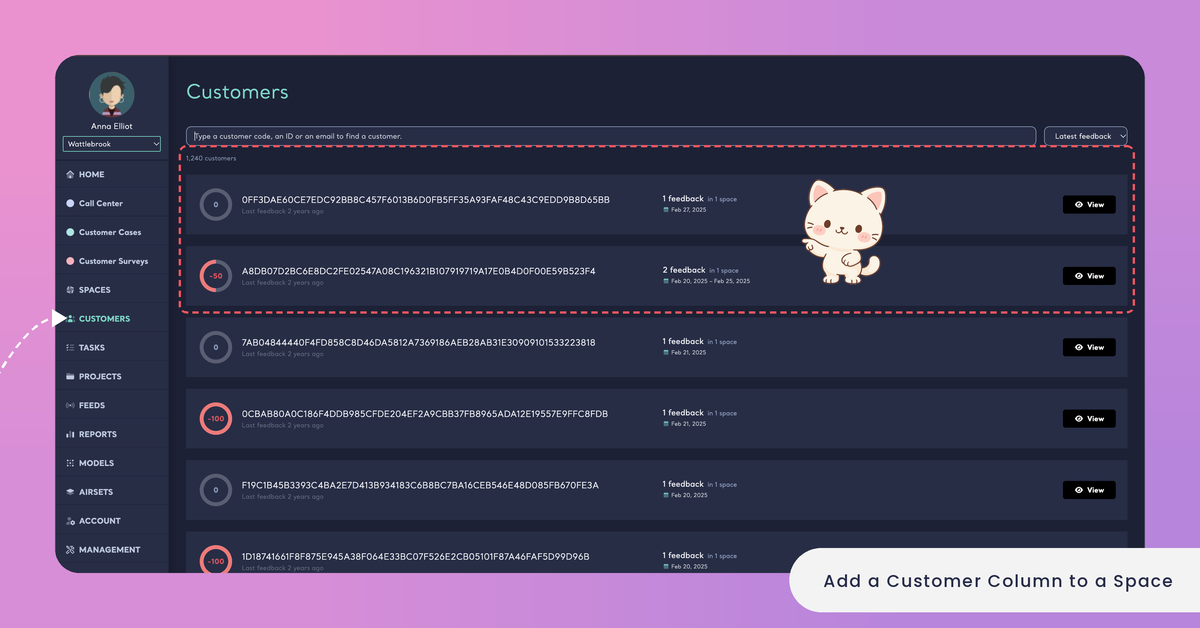
Every file you upload after that is matched to the Customer Column like the Space's other columns, and its customers are counted as soon as it is classified. If you take a file back, its records leave their customers too, and a customer whose feedback was all in that file is no longer listed. See Take Back a File from a Space.
The Customer Column is kept apart from the Space's other columns. It isn't offered as a column to filter or compare by on the Space's pages, and Signals don't use it as a group, because a key that is different for every customer doesn't make a segment. To read the feedback of one customer, open their page under CUSTOMERS.