Test a Custom Model
4 mins read - Created on Oct 24, 2025A Custom Model is an AI model that you create and train with your own labeled data to automatically classify new text according to your categories.
After creating your model, you can test it directly in Kimola to see how it performs before using it in large-scale analysis. Testing helps you verify whether your model correctly classifies text based on your labels and ensures it’s ready for real datasets. You can test a model by manually entering text or by uploading a document for batch testing.
Sign in to your Kimola account and go to the Models section on the left panel. Select the Custom tab and click on the model you want to test.
This will open your model’s detail page, where you’ll find testing options.
Test with a Text
If you want to quickly see how your model interprets text, you can test it with a sentence or paragraph.
- On your model’s Overview page, find the Text section.
- Type or paste your sample text into the input box, and the model will instantly display the predicted label and sentiment for your input.
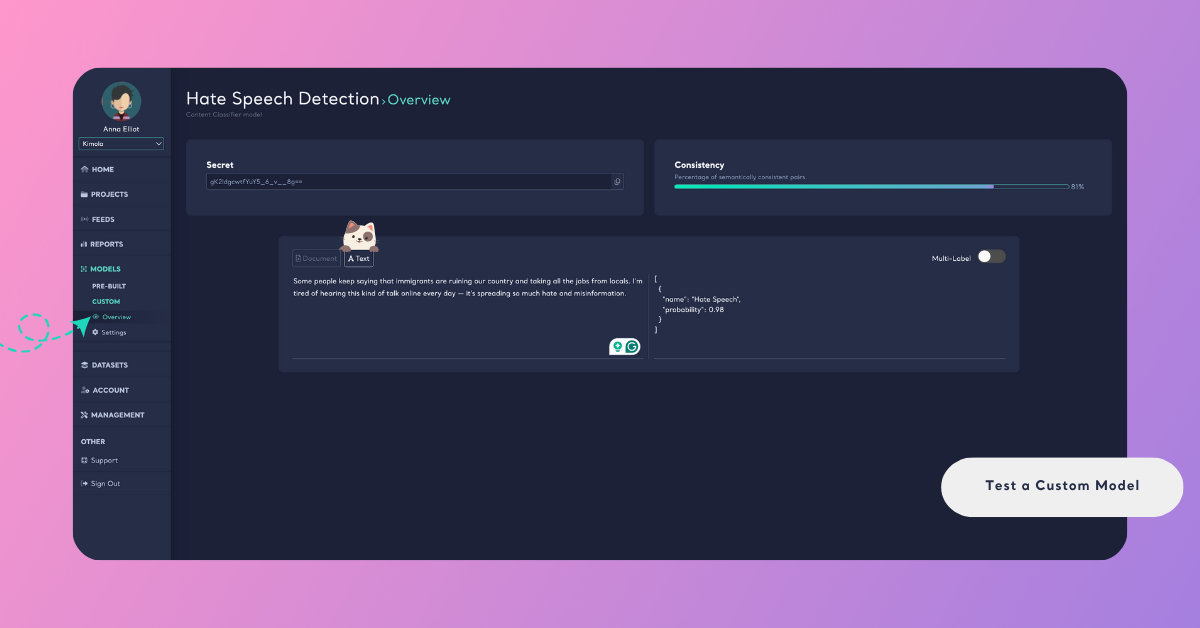
This method is ideal for quickly checking if your model correctly understands short samples before running it on larger datasets.
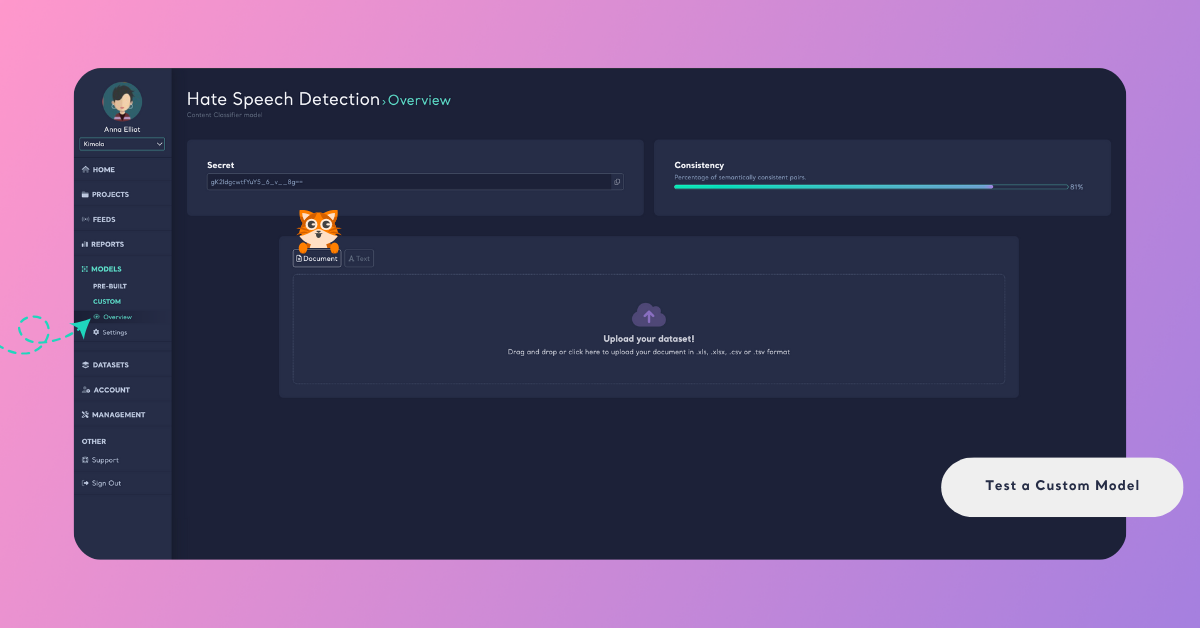
Test with a Document
You can also upload a file to test how your model performs on multiple records at once.
Step 1: Upload Your Dataset
In the Test Your Model (Overview) area, open the Document section and upload your dataset by dragging and dropping your file or by clicking Upload Your Dataset. You can upload documents in .xls, .xlsx, .csv, or .tsv format.
Step 2: Map Your Columns
After uploading, you’ll see a preview of your dataset. Here, map the required columns to continue:
- Content column: The column that contains the text data to be analyzed (e.g., customer feedback, survey responses, product reviews, social media posts, or support tickets).
- URL column: An optional field linking to the source of each record. This can later be used as a filter or to navigate to the original source in your report.
- Date column: An optional field containing the date of each record. Including it helps visualize data trends over time.
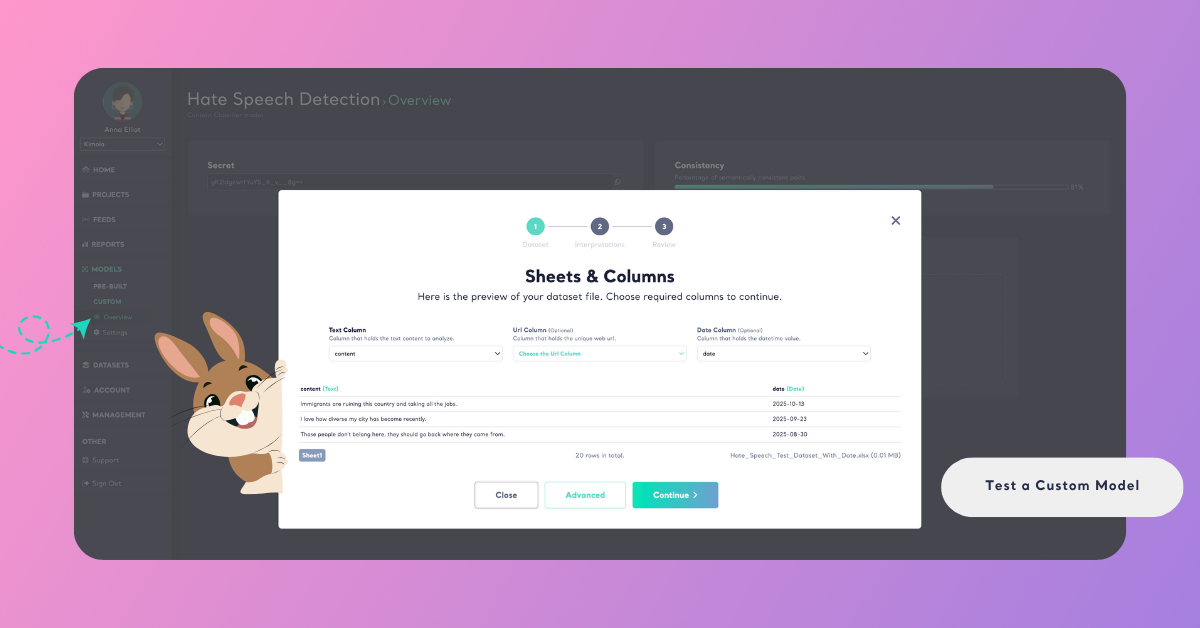
Once you complete your selections, proceed to the next step:
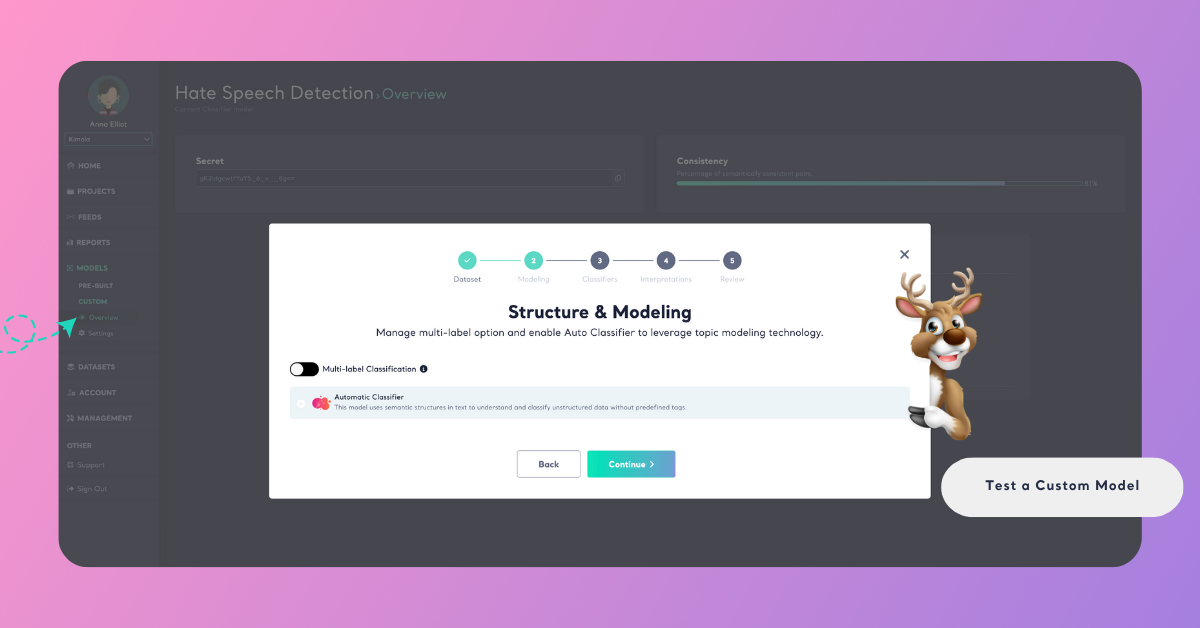
To analyze your data only with the selected Custom Model, click Advanced and uncheck Automatic Classifier. The Automatic Classifier is Kimola’s ready-to-use feature that classifies customer feedback automatically — without any setup, manual labelling, or training. It’s fast and error-free, but turning it off ensures that your test runs purely with your own trained model.
If you want each record to be categorized under just one label, uncheck the Multi-label option as well. Multi-label classification allows a single text to fall into more than one category — for example, a comment that mentions both delivery and pricing.
On the next screen, your chosen model will already be selected for testing. If everything looks correct, continue to the next step.
Step 3: Select Interpretations
In the Interpretations step, select any interpretations you wish to include or skip this step if you prefer to proceed directly.

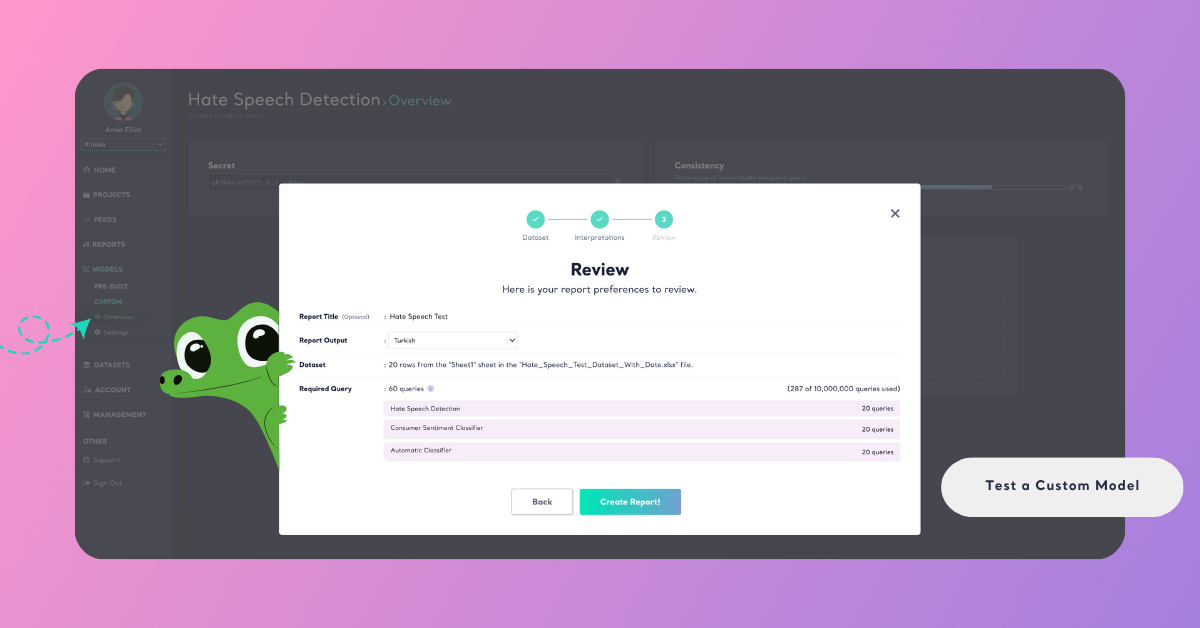
Step 4: Review and Complete the Test
Give your report a name and select the output language of your report.
Here, you’ll also see how many rows your dataset contains and how many queries will be required to run the test.
- Each text (for example, each customer comment or feedback entry) consumes one query per model used.
- If you use multiple models in the same test — such as a Pretrained Classifier and the Automatic Classifier — the total query count will increase accordingly.
Click the info icon next to Required Query to view a detailed breakdown of how many queries your test will use per model. This helps you estimate your total query usage before running large datasets.
Testing with a document is especially useful when validating your model’s performance on real data before applying it in reports or feeds.