Create a Custom Model with a Report
4 mins read - Created on Oct 24, 2025In Kimola, a report is where you analyze and categorize text data such as customer feedback, survey responses, or social media comments. If you’ve already labeled or tagged data inside a report, you can turn that labeled data into a reusable AI system — called a Custom Model — without starting from scratch.
A Custom Model is an AI model you train with your own data so that it learns to automatically classify new text according to the categories you’ve defined.
Creating a custom model from a report allows you to transform your existing manual work into an automated, scalable analysis process.
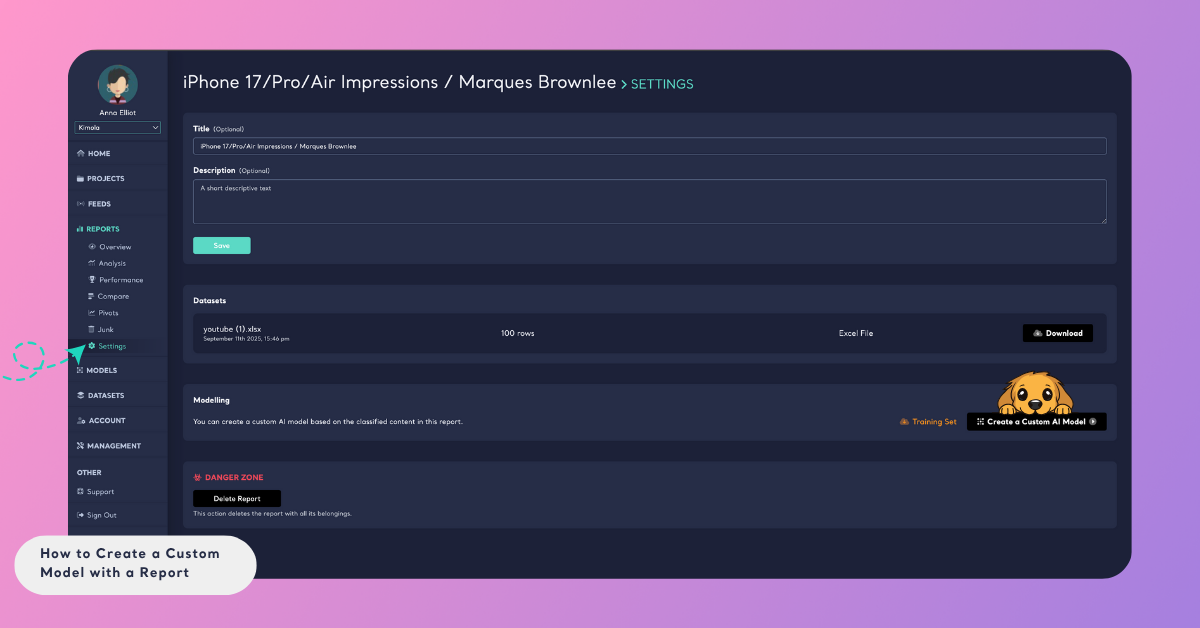
To get started, log into your Kimola account and open your dashboard. In the left panel, click Reports, find the report that contains the labels you want to use, and open its Report Settings page. In the Modelling section, click Create a Custom AI Model to start building your model.
Step 1: Map the Training Set
A training set is the labeled data that teaches your model how to recognize and classify text correctly. It contains examples of text (content) and the corresponding labels you’ve assigned — for instance, “product quality,” “delivery,” or “pricing.” Your model learns from these examples to make predictions on new, unseen text later on.
After you click Create a Custom AI Model, you’ll first see a preview of your training data. Here, map the columns that the AI will use:
- Select the column that contains your text under Content.
- Select the column that contains your categories under Label.
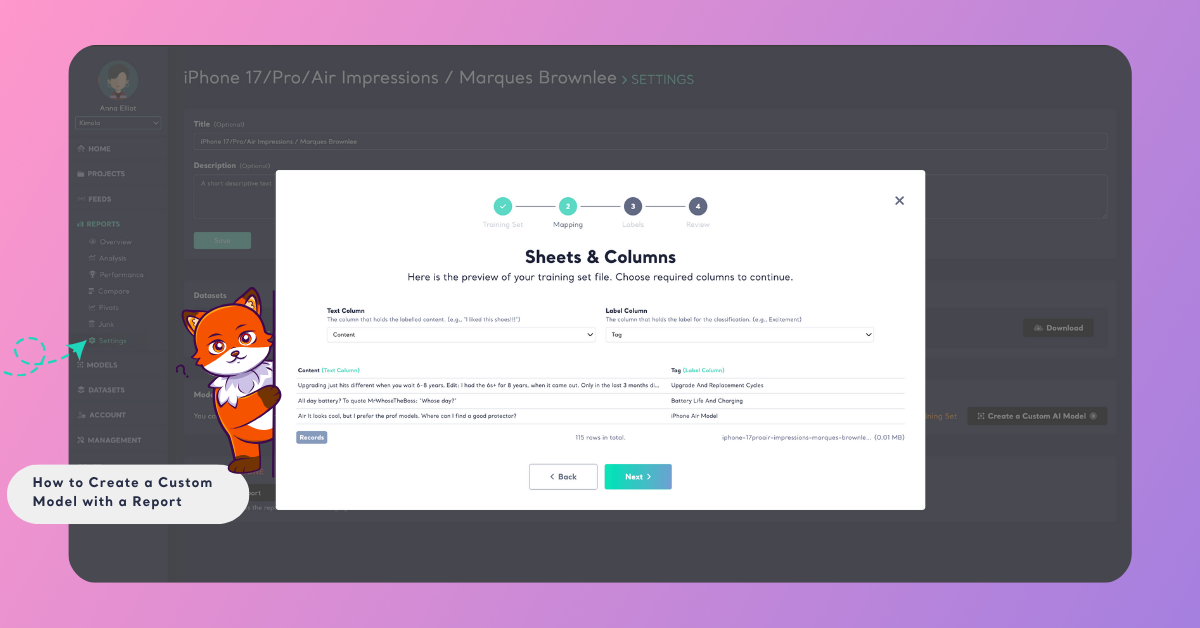
This step ensures that the model knows which part of your data holds the text to analyze and which part contains the correct labels to learn from.
You can also download the training set of this report by clicking the Training Set button located in the Modelling section. This allows you to review or reuse your labeled data before creating the model.
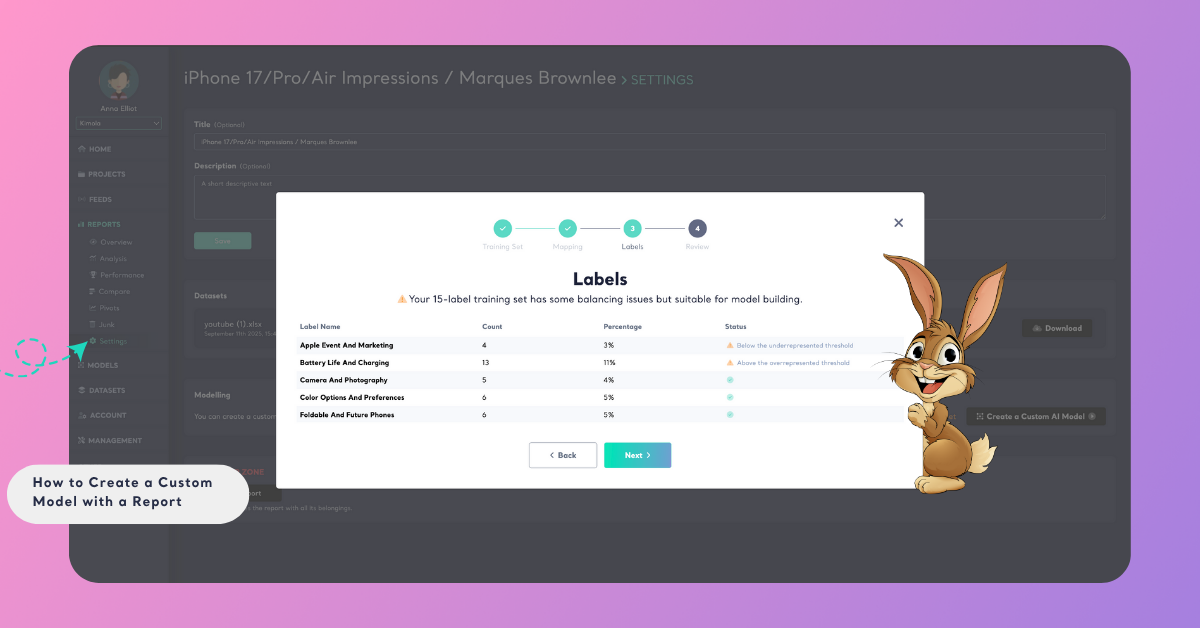
Step 2: Review Label Distribution
Next, you’ll see the Label Distribution screen, which shows how your labels are spread across your dataset. Balanced label distribution is important because it helps your model learn each category equally well. If one label has significantly more data than others, the model might favor it during training. Kimola automatically checks this and provides feedback. These notifications help you understand whether your labeled data is balanced enough for optimal model performance.
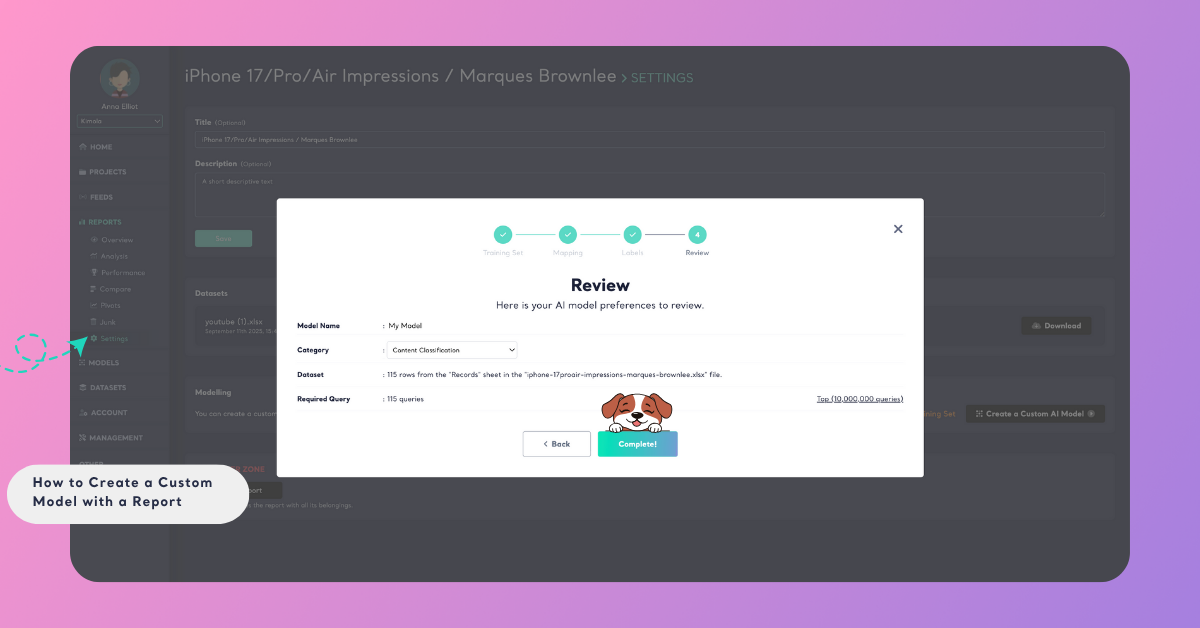
Step 3: Review and Finalize Your Model
In the final step, review your model’s details. Give your model a descriptive name and choose the category type that matches your goal:
Content Classification: Classifies what the text is about (topics/themes).
Labels may include categories like delivery, pricing, product quality, app performance, or support channel.
Sentiment Classification: Classifies how the text feels (emotion/polarity).
Sentiment labels typically include categories such as positive, negative, and neutral.
Choose Content Classification when your labels describe subjects or aspects, and choose Sentiment Classification when they describe opinions or tone.
Avoid mixing aspect labels and sentiment labels in the same model. If you need both, create two models: one for content (topics) and one for sentiment (tone).
You’ll also see the Required Query field, which shows how many queries your model will consume during training. This number depends on the total rows (data points) in your dataset — each row counts as one query.
Once everything looks correct, click Complete to start training. Kimola will process your data in the background and notify you via email when your model is ready.
Step 4: Use Your Model
After training is complete, you can start using your Custom Model to classify new datasets or feeds in Kimola automatically. Your model will recognize the same categories that were used in your report — helping you replicate your analysis faster and more consistently.
Before you begin large-scale analysis, it’s a good idea to test your model on a few examples to ensure it’s performing as expected. Learn how to do this in the Test a Custom Model article.
Once you confirm that your model works accurately, you can confidently use it across different projects or datasets to automate classification.