Create a Custom Model with a Training Dataset
6 mins read - Created on Feb 27, 2025A model in Kimola is an artificial intelligence (AI) system that can understand and classify text. It learns patterns from data and uses this knowledge to automatically categorize new content — such as customer feedback, product reviews, or survey responses — into meaningful groups.
Supervised machine learning harnesses the power of labeled datasets to train algorithms, enabling them to accurately classify new inputs based on learned patterns. Developing a custom machine learning model for text classification involves tailoring this technology to label and organize text data, such as customer feedback or product reviews, according to specified criteria. The key to building an effective classification model lies in meticulously preparing your training data. Follow this article to organize and refine your data for optimal model training and performance.
Create a Training Set
A training set is a collection of data specifically assembled to teach your machine learning model how to recognize patterns and make predictions. It contains examples of inputs, along with their correct outputs, which the model uses to understand how to generalize this knowledge to new, unseen data. The quality and diversity of your training set are vital, as they directly influence how effectively your model learns and performs on real-world tasks. By curating a well-labeled, clean, and comprehensive training set, you're laying the foundation for a robust and accurate machine learning model.
1. Goal Setting
Define the purpose of your text classification model clearly. Specify whether you aim to categorize customer reviews, segment user feedback, or classify support requests, ensuring that your project's objectives dictate your approach to data collection.
2. Data Collection
Gather a diverse and comprehensive set of text data related to your goal. For instance, if building a model for e-commerce reviews, collect data from platforms like Amazon or Etsy. Ensure this data encompasses a variety of topics and tones to train your model effectively.
3. Data Cleaning
Clean your dataset by removing errors, inconsistencies, and any meaningless content, such as entries full of emojis or isolated punctuation marks. This step is crucial to ensure the model only learns from relevant and coherent text samples.
A clean dataset means that links, nouns, numbers, and names should be deleted from each row. Here is a quick guide to deleting those with Google Sheets automatically.
4. Data Labeling
Label your text data to prepare it for supervised learning. Use specific and relevant labels like “product quality,” “customer service,” or “pricing” to categorize the text. Ensure your labeling scheme remains clear and consistent across your dataset.
Use short, descriptive, and neutral names for your labels. Avoid using emotional or opinion-based words — instead, focus on the theme of the text.
Use "Delivery" instead of "Bad Delivery", or "Pricing" instead of "Too Expensive".
Keep labels consistent in style and format (e.g., all singular nouns, same capitalization). This improves both readability and model accuracy.
Keep in mind, each sector has its own unique categories. If there are specific KPIs you want to track, such as “product returns” or “repeat purchases,” tailor these as labels and mark them consistently within your training dataset. This will help teach your model to recognize and focus on these important aspects.
Target a minimum of 500 samples per label, with a recommended count of 2,500 to provide robust training instances. Limit your model to 2–8 labels for optimal performance.
5. Splitting the Data
Reserve 20-30% of your data as a test set to evaluate your model's accuracy post-training. This test set is crucial for validating the model's ability to classify data it hasn't seen before.
6. Shaping the Training Set
Format your labeled data in a structured manner that suits machine learning environments. Use a spreadsheet format like CSV or Excel, ensuring that each entry is well-organized and easy for the model to process.
By diligently following these steps, you can develop a high-quality training set that will enable your machine learning model to efficiently classify text data. The thoroughness with which you prepare your data has a significant impact on the model's capacity to accurately interpret and categorize new information.
Create a Model
Creating a custom machine learning model can be an empowering experience, especially when you don't have to worry about writing a single line of code. With Kimola, building a machine learning model tailored to your data needs is a straightforward process. This guide will walk you through the necessary steps, ensuring you can start leveraging your personalized model without the hassle. Follow along to create a model using your training data in just a few simple steps.
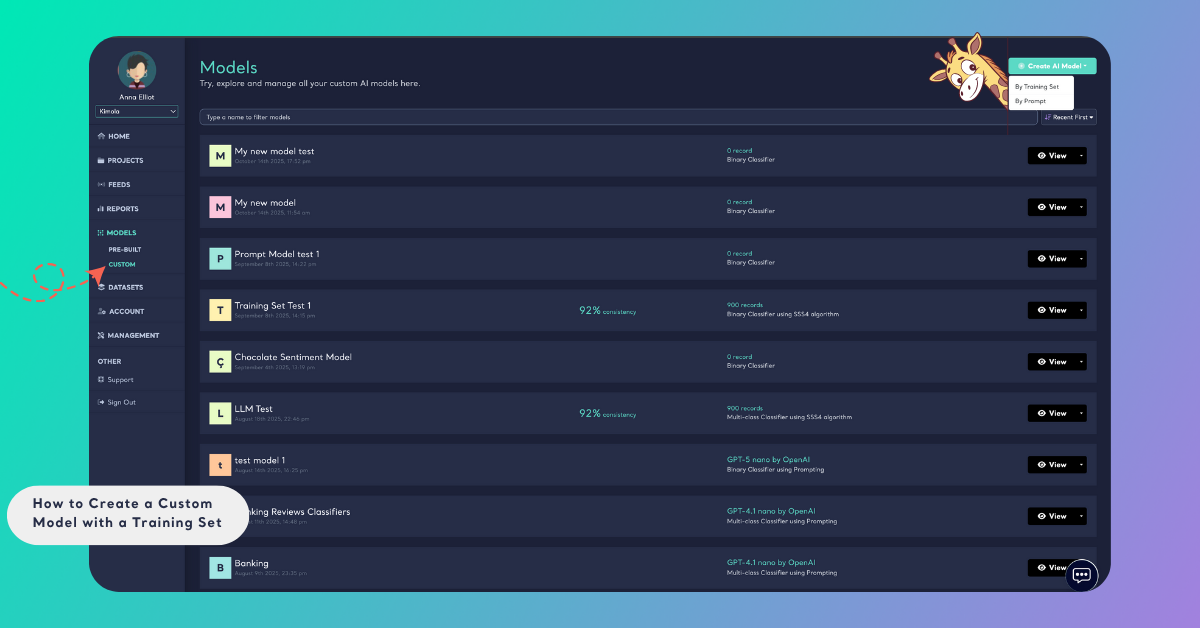
To get started, log into your Kimola account and open your dashboard. From the left panel, click Models to access the model management area. Under this section, select the Custom tab to start building your own AI model. Once there, click the Create AI Model button in the top-right corner and choose By Training Set to begin creating your model.
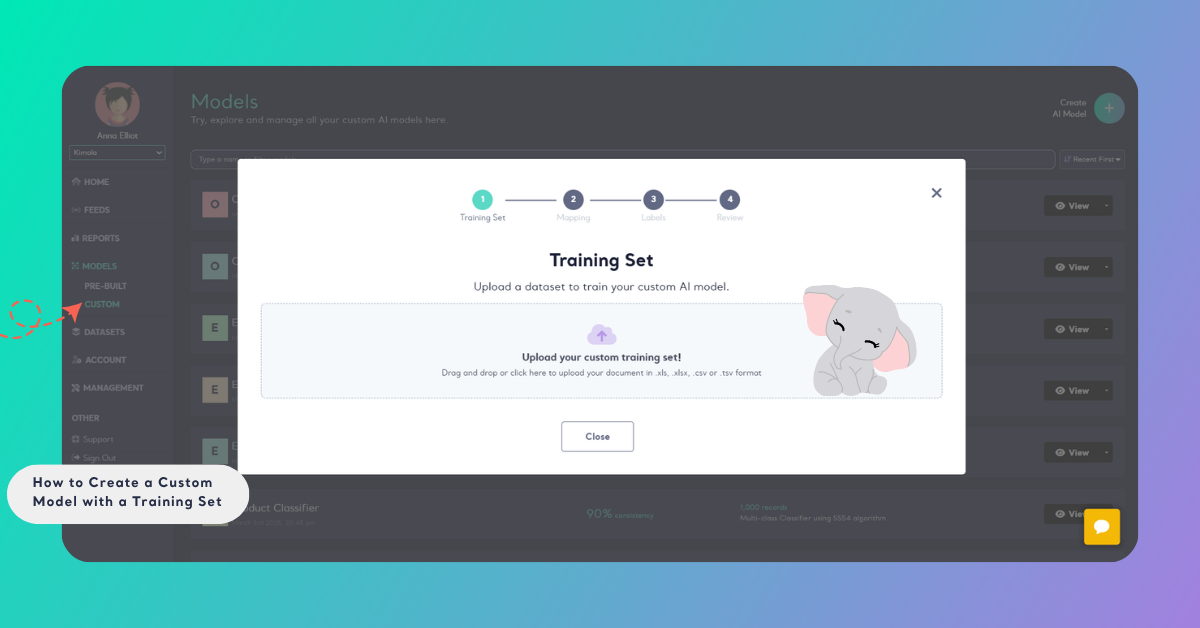
Step 1: Upload Your Training Set
Drag and drop your pre-prepared training set into the designated upload area, or use the arrow sign to browse and select the file.
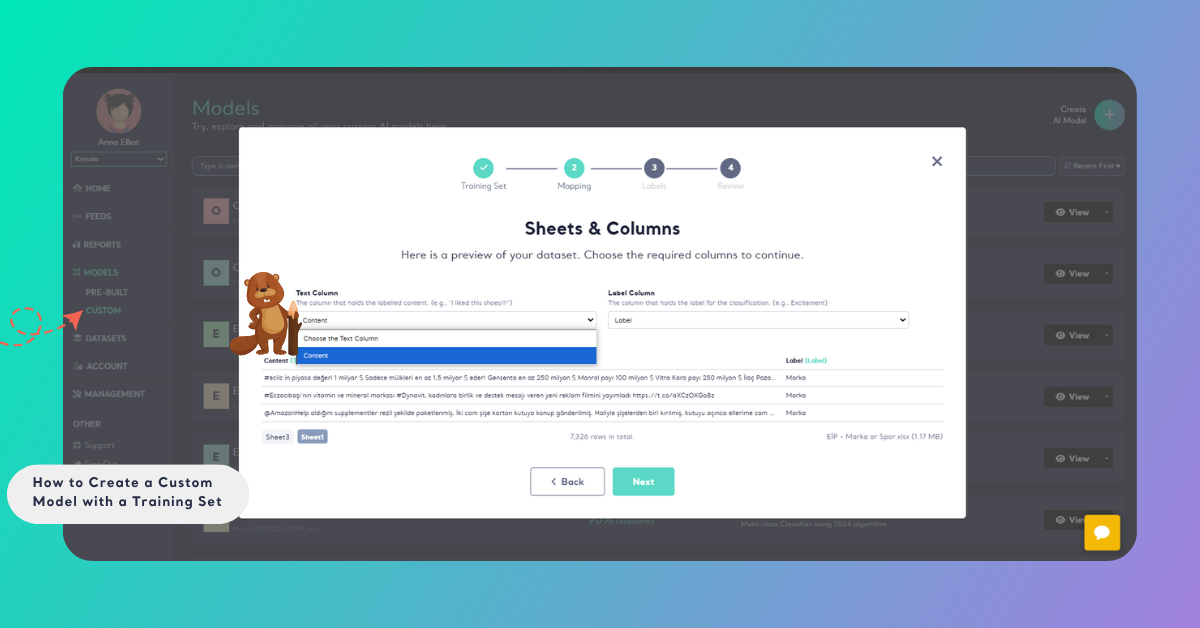
Step 2: Map the Training Set
In the preview window that opens, specify the column containing the data you want to classify under the "Content" section. Then, select the column with the labels under the "Label" section. Once you've set up your training data, click the "Next" button to move forward.
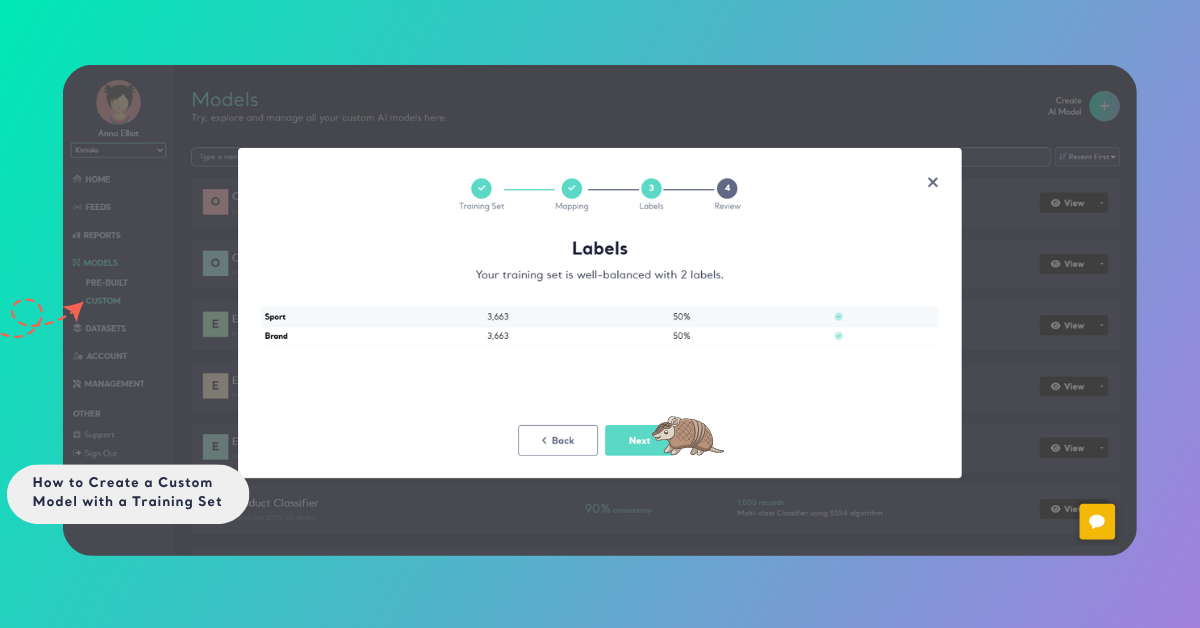
Step 3: See the Label Distribution
When creating a machine learning model, one of the other steps is examining the label distribution. You can see the number of data for each label in your training set at this stage.
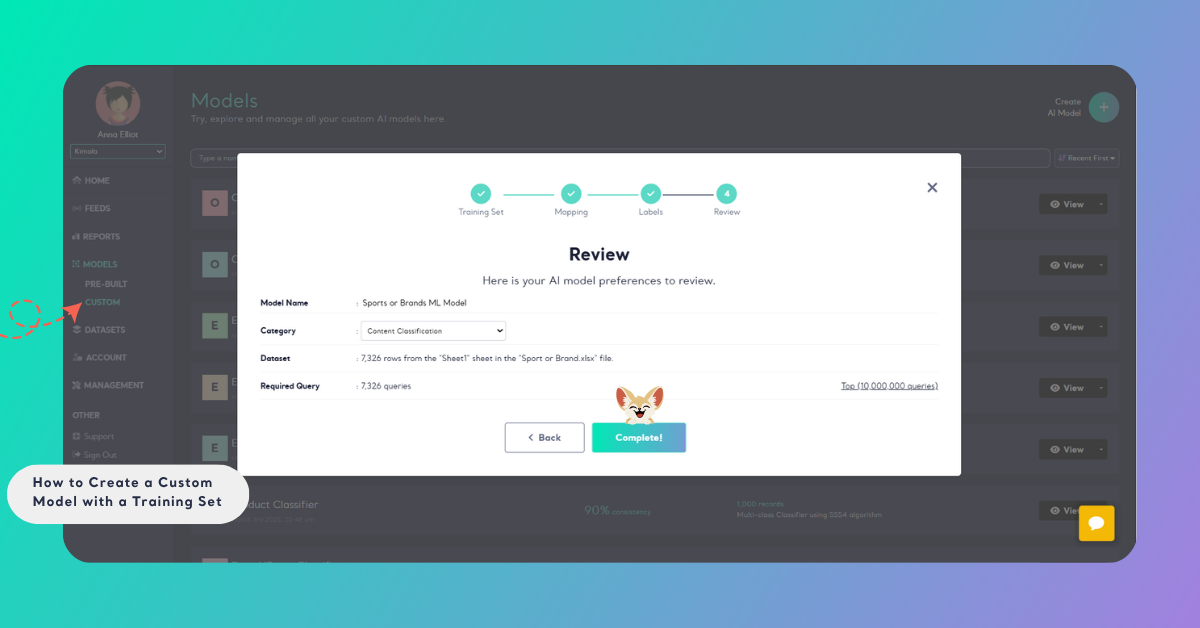
Step 4: Finalize Your Model
In the final step, give your model a descriptive name and choose the appropriate category. Once completed, click "Complete". Your model's training will be processed in the background and ready in a short time.
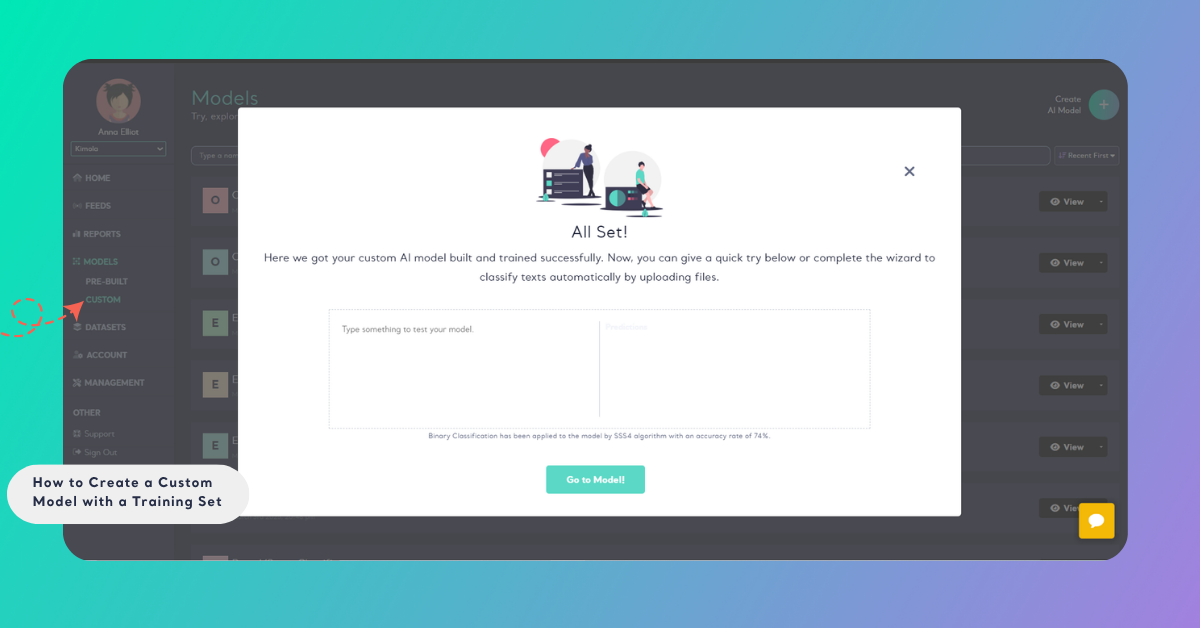
Step 5: Go to Model
Once your model is successfully created with the training set, the following screen will appear. On this screen, you can quickly test your model if you wish. Additionally, you can navigate to the model's page using the "Go to Model" button located at the bottom of the screen.
By following these steps, you can effortlessly create a machine learning model tailored to your data, enabling more targeted analysis and insights.