Add Interpretations to a Report
4 mins read - Created on Feb 20, 2025Interpretations can be added to reports in Kimola to generate additional analysis outputs. This article explains when interpretations can be added to a report and how to generate them step by step.
Sign in to your Kimola account and open the report you want to work with from the Reports section.
When Can Interpretations Be Added?
Interpretations can be added at two different stages:
- During report creation While creating a report (from a feed, link, custom dataset, or integration), you can select interpretations as part of the setup process.
- After a report is created If no interpretations were selected initially, or if you want to add more, interpretations can be generated later from the report overview.
This flexibility allows you to decide when and how you want to enrich your report outputs.
Add Interpretations During Report Creation
When you create a report, you can add interpretations from the Interpretations step in the setup flow.
- Open the report creation flow (from a Feed, Link, Custom Dataset, or Integration).
- When you reach the Interpretations step, browse the available interpretation options.
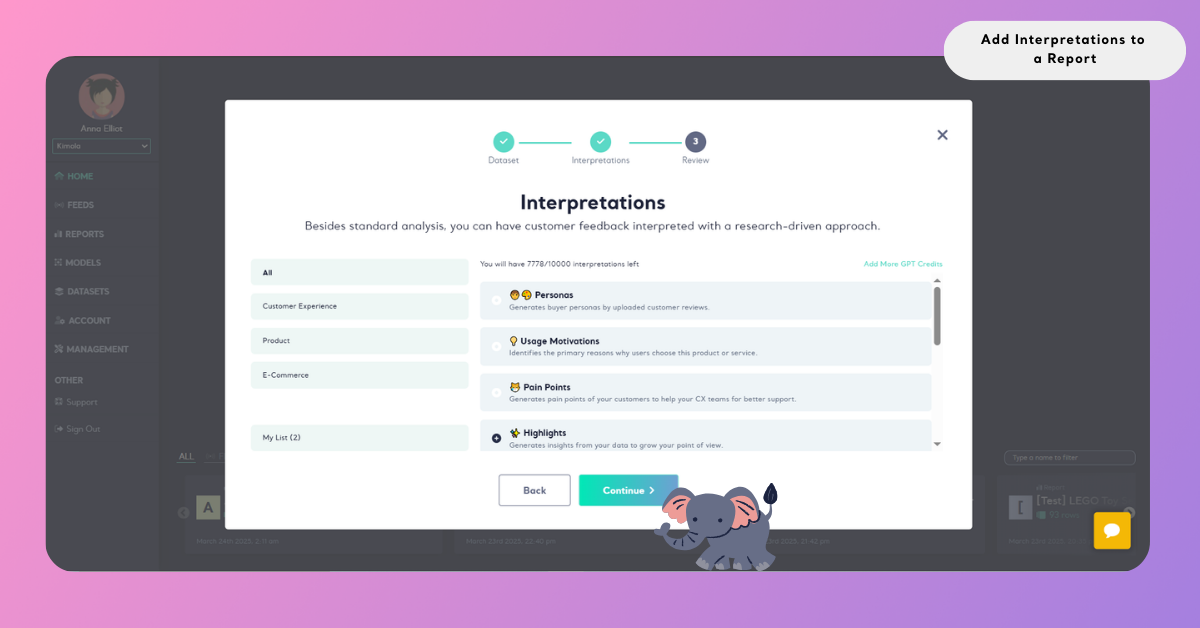
- Select the interpretations you want to include.
- Check My List on the left to review what you selected (remove any item if needed).
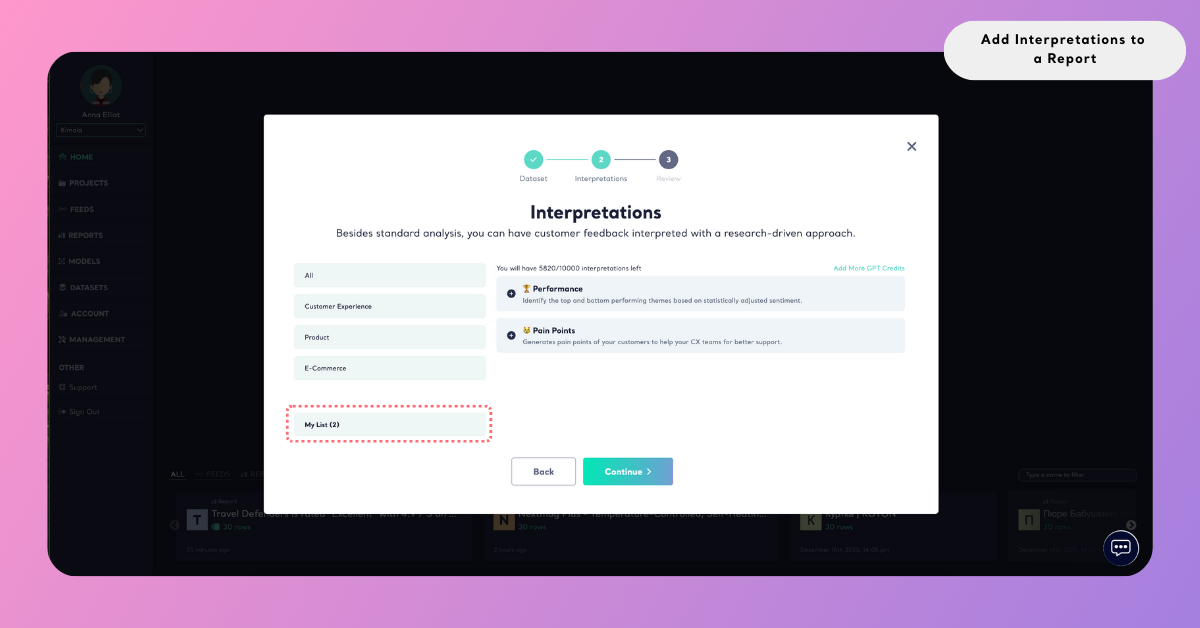
- Continue to the next step and finish creating the report.
Once the report is created, Kimola generates the selected interpretations and adds the outputs to your report automatically.
Add Interpretations After Report Creation
You can generate interpretations even after a report has already been created. This allows you to enrich your analysis later without recreating the report.
To add interpretations to an existing report:
- Open the Reports section and select the report you want to work on.
- Go to the report’s Overview page.
- At the top of the page, locate the Interpretations panel or slider.
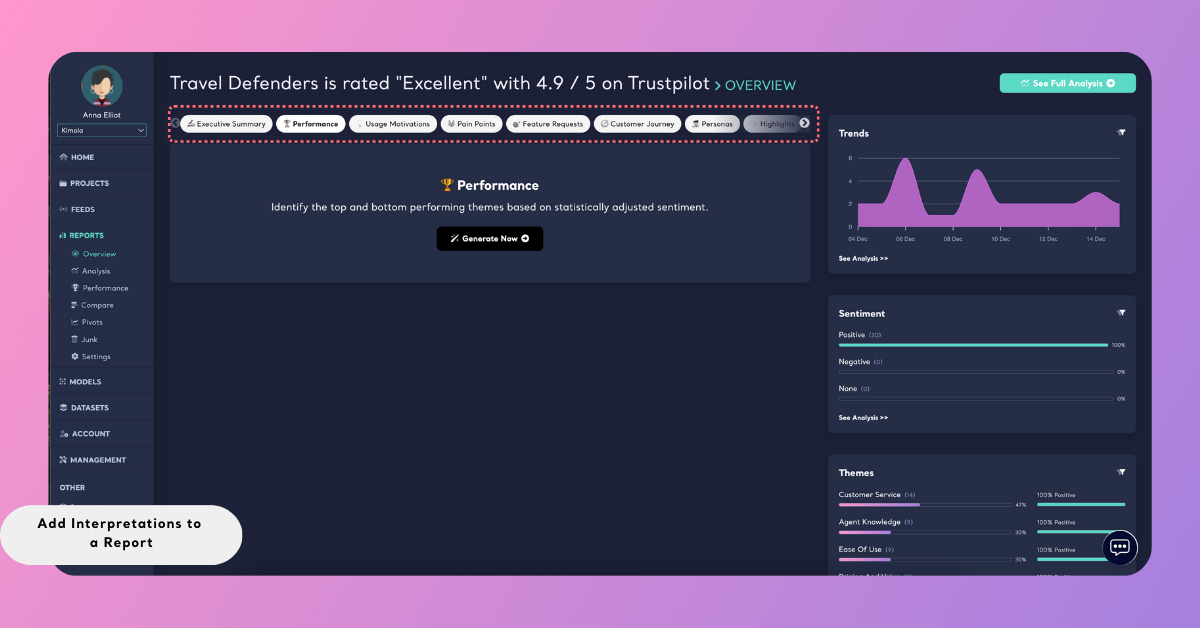
- Select the interpretation you want to generate.
- In the window that opens, click Generate now.
- To add more interpretations, click All to view the full list and make additional selections.
- Click Start to begin generation.
Once the process is complete, the selected interpretation outputs will appear inside the report and can be reviewed immediately.
This approach lets you expand your insights incrementally as new questions or analysis needs arise.
An Executive Summary is generated automatically for every report by default. No interpretation selection or additional action is required to include it.
Interpretation Credits
Interpretations in Kimola are powered by the GPT Add-On and use GPT credits. These credits work as a usage-based system rather than a fixed monthly limit.
Here’s how interpretation credits work:
- Usage-based consumption: GPT credits are used only when you generate an interpretation. If you don’t run interpretations, no credits are spent.
- One interpretation = one query: Each interpretation you generate counts as a single query and deducts one GPT credit from your balance.
- Flexible usage: GPT credits do not reset monthly. You can use them whenever you need, based on your analysis workflow.
- Starting credits: Each Kimola account starts with 5 GPT credits, allowing you to try interpretations and generate initial insights.
This structure gives you full control over when and how you use interpretations, helping you manage advanced analysis features efficiently based on your needs.
Purchasing GPT Credits
If you need additional GPT credits to generate more interpretations, you can purchase them directly from the Kimola Pricing page.
To buy GPT credits:
- Go to the Kimola Pricing page.
- Scroll to the GPT Credits add-on section.
- Choose the credit package that fits your needs.
- Complete the purchase.
Purchased GPT credits are added to your account immediately and can be used across all reports. GPT credits do not expire and can be purchased at any time, allowing you to scale interpretation usage based on your analysis requirements.
After Interpretations Are Generated
Once interpretations are added to a report, you can:
- Review the generated outputs directly in the report
- Export or share the report with interpretations included
Once generated, interpretations are saved within the report and remain available each time the report is opened. If you need to edit, remove, or regenerate interpretations, see Manage Interpretations for detailed steps.